Published:
Tagged: AI-Agents WebMCP JavaScript Jekyll
WebMCP - this blog now has tools
TLDR; WebMCP is a proposed web standard that lets a page register tools for an AI agent running in the browser: a name, a description, an input schema and a function. I added five to this blog. The pages haven’t changed; they just say what they do a second time, for a reader without a cursor.
On 30 September I’m talking at apiDays London about who we’re really writing docs and building tools for, and one slide in it is about WebMCP. It showed the proposal’s own example, a todo app with an add-todo tool. That’s fine, but it’s somebody else’s code, and I’d rather show something I’ve actually shipped. So I added WebMCP to this blog.
The problem we’re trying to solve
Say an agent in your browser is asked “what has Paul written about AI agents?”. Today it has two options. It can read the rendered page, work out which bits are post titles and which are navigation, follow the pagination, and hope the layout doesn’t change. Or it can go looking for an API, and a static Jekyll blog doesn’t have one.
Both are guessing. The page knows exactly what’s on it and has no way to say so.
What WebMCP is
WebMCP is a proposal in the W3C Web Machine Learning community group. In its own words, it lets developers “expose web application functionality, either JavaScript functions or HTML <form> elements, as tools with natural language descriptions and structured schemas, designed for AI agent ingestion.”
If you’ve written an MCP server, the shape is familiar. The difference is where it runs: the tools live in the page, run in the page, and use the page’s own code. The proposal is explicit that this doesn’t replace the page: “The human web interface remains primary; agent tools augment rather than replace user interaction.”
It’s early. In Chrome it’s available from version 149 behind a flag (chrome://flags/#enable-webmcp-testing) and an origin trial. But it’s not only a spec any more: Stripe already documents WebMCP tools on Checkout, Elements and the hosted invoice page, “rather than relying on page scraping and simulating clicks”.
What pardel.dev exposes
Five tools:
| Tool | What it does |
|---|---|
search-posts |
Search the posts by keywords and/or tag |
list-tags |
Every tag, with how many posts carry it |
list-projects |
The open-source projects, newest first |
open-page |
Navigate to a page on this site |
list-talks |
Talks, podcasts and interviews (only on /public-speaking/) |
All of them except open-page only read, and they say so.
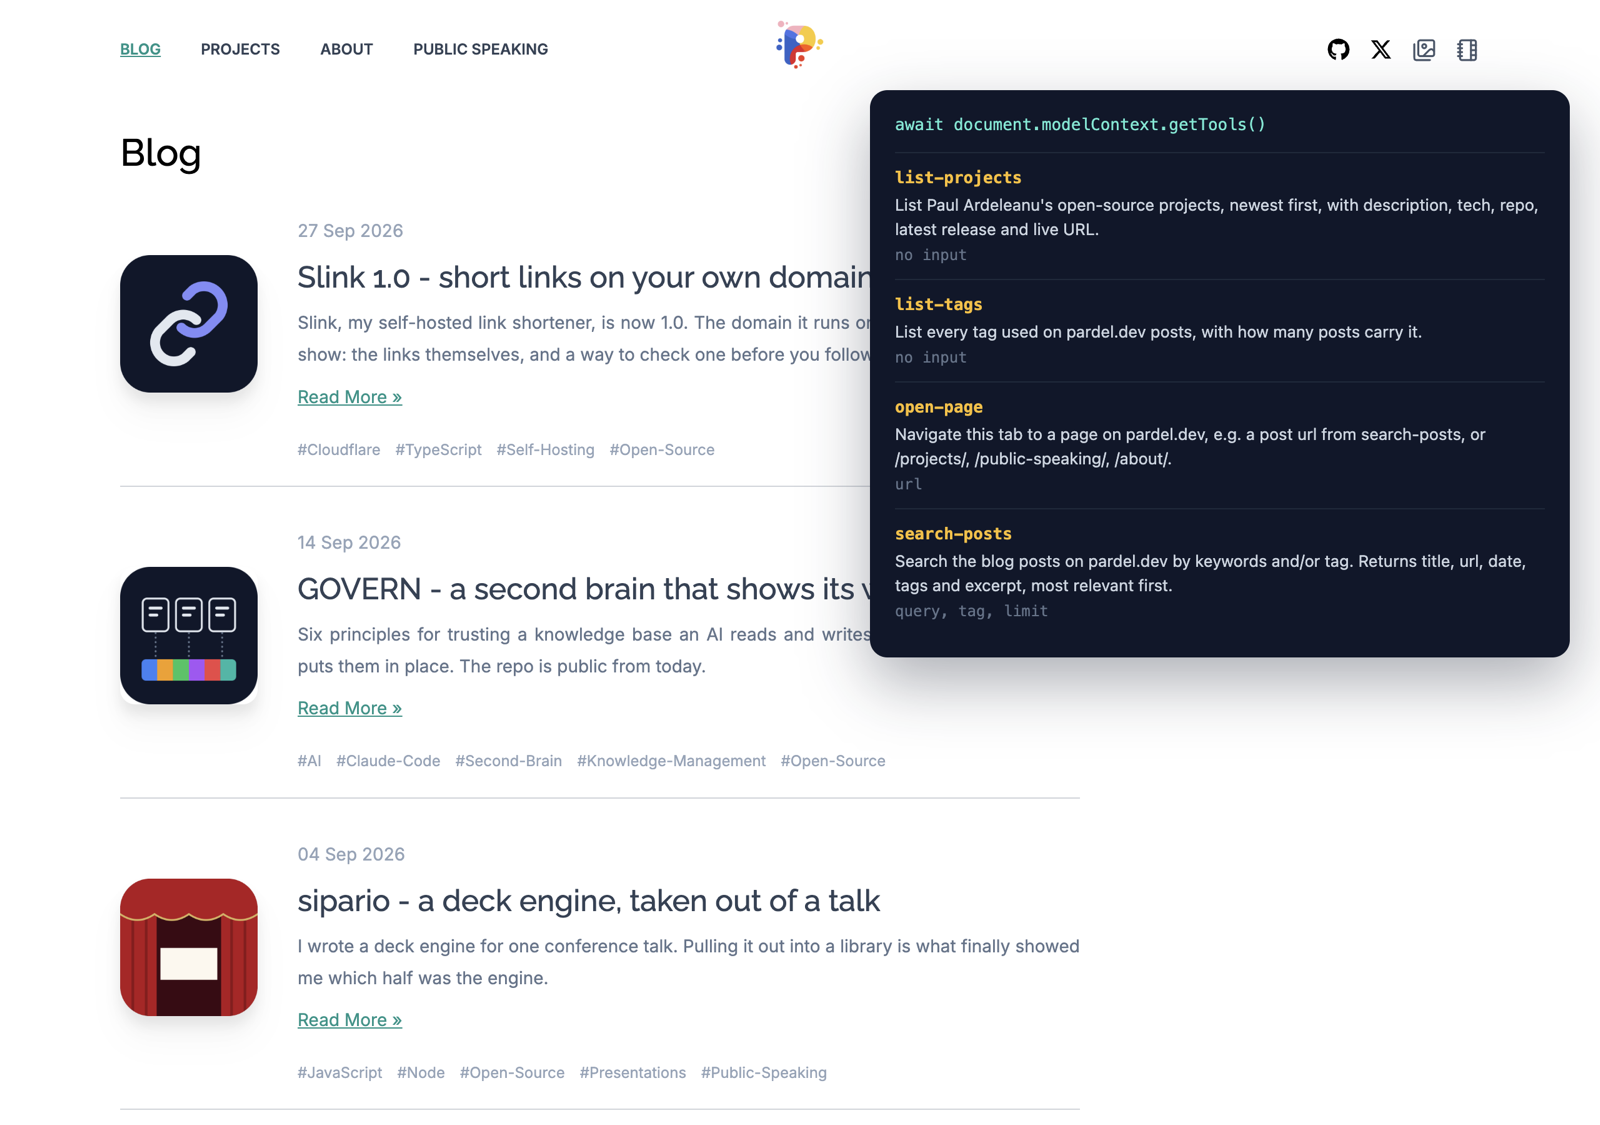
This is what Chrome sees on the home page. The dark panel isn’t part of the site: it’s a few lines of script I ran in the page, calling Chrome’s own document.modelContext.getTools() and printing what comes back. The script is further down.
The data: one JSON file, built with the site
A static site has no backend to call, so the tools need their data from somewhere. The answer is a JSON file Jekyll builds alongside everything else, from the same posts and project list the pages use:
{
  "posts": [
    {%- for post in site.posts %}
    {
      "title": {{ post.title | jsonify }},
      "url": {{ post.url | jsonify }},
      "date": {{ post.date | date: "%Y-%m-%d" | jsonify }},
      "tags": {{ post.tags | jsonify }},
      "excerpt": {{ post.excerpt | strip_html | strip_newlines | strip | jsonify }}
    }{% unless forloop.last %},{% endunless %}
    {%- endfor %}
  ],
  ...
}
That’s the important bit. There’s no second copy of anything to keep up to date: publish a post and the tool knows about it on the next build.
The tools: one script
Registering a tool is one call on document.modelContext. Here’s search-posts, trimmed a little:
await document.modelContext.registerTool({
  name: 'search-posts',
  description: 'Search the blog posts on pardel.dev by keywords and/or tag. ' +
    'Returns title, url, date, tags and excerpt, most relevant first.',
  inputSchema: {
    type: 'object',
    properties: {
      query: { type: 'string', description: 'Keywords, e.g. "swift testing"' },
      tag: { type: 'string', description: 'Only posts with this tag, e.g. "AI"' },
      limit: { type: 'number', description: 'Maximum results, default 10' }
    }
  },
  annotations: { readOnlyHint: true },
  execute: async function (input) {
    const data = await loadCatalog();  // fetches /webmcp.json, once
    return reply(search(data.posts, input));
  }
});
A name, a description, a JSON schema for the input, and a function. The description matters more than it looks: it’s the only thing the agent reads to decide whether this is the tool it wants, so it’s written for that reader.
The script starts by checking the API is there, and quietly does nothing if it isn’t:
var mc = document.modelContext;
if (!mc || typeof mc.registerTool !== 'function') { return; }
So every other browser gets exactly the site it had before.
Calling a tool is the agent’s side of it. Here’s search-posts asked for three posts tagged AI:
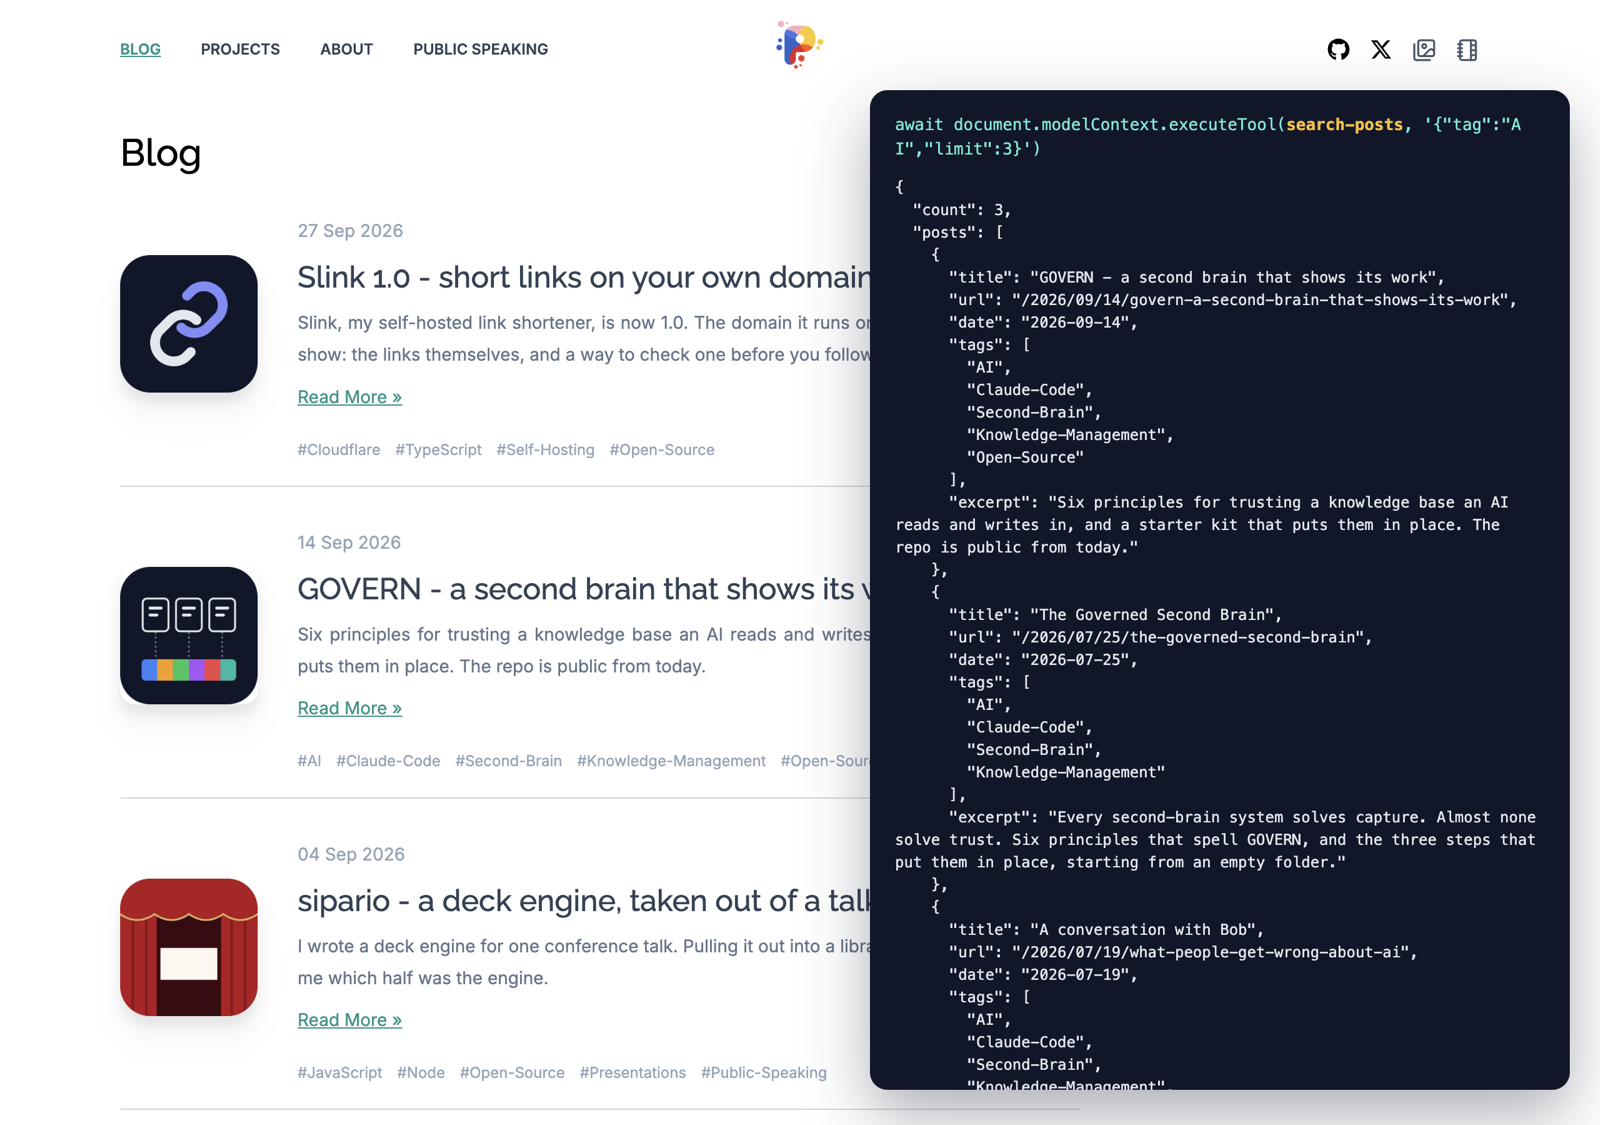
One thing that caught me out: in Chrome 154, executeTool wants its input as a JSON string. Pass it a plain object and you get UnknownError: Failed to parse input arguments. You’ll only hit this if you’re writing the agent side yourself, but it cost me a few minutes.
This is the script behind both panels, minus the styling. Paste it into the DevTools console on any page that registers tools (with the flag on) and you get the same data back:
const mc = document.modelContext;

// What the page declares
const tools = await mc.getTools();
tools.map(t => ({
  name: t.name,
  description: t.description,
  inputs: Object.keys(JSON.parse(t.inputSchema).properties || {})
}));

// Calling one, the way an agent would
const search = tools.find(t => t.name === 'search-posts');
const result = await mc.executeTool(search, JSON.stringify({ tag: 'AI', limit: 3 }));
JSON.parse(JSON.parse(result).content[0].text);
Note the three JSON.parse calls. getTools() hands the input schema back as a string, executeTool returns a string, and inside that is the MCP-style content my tool returns, whose text is JSON again.
A tool belongs on the page where its data is
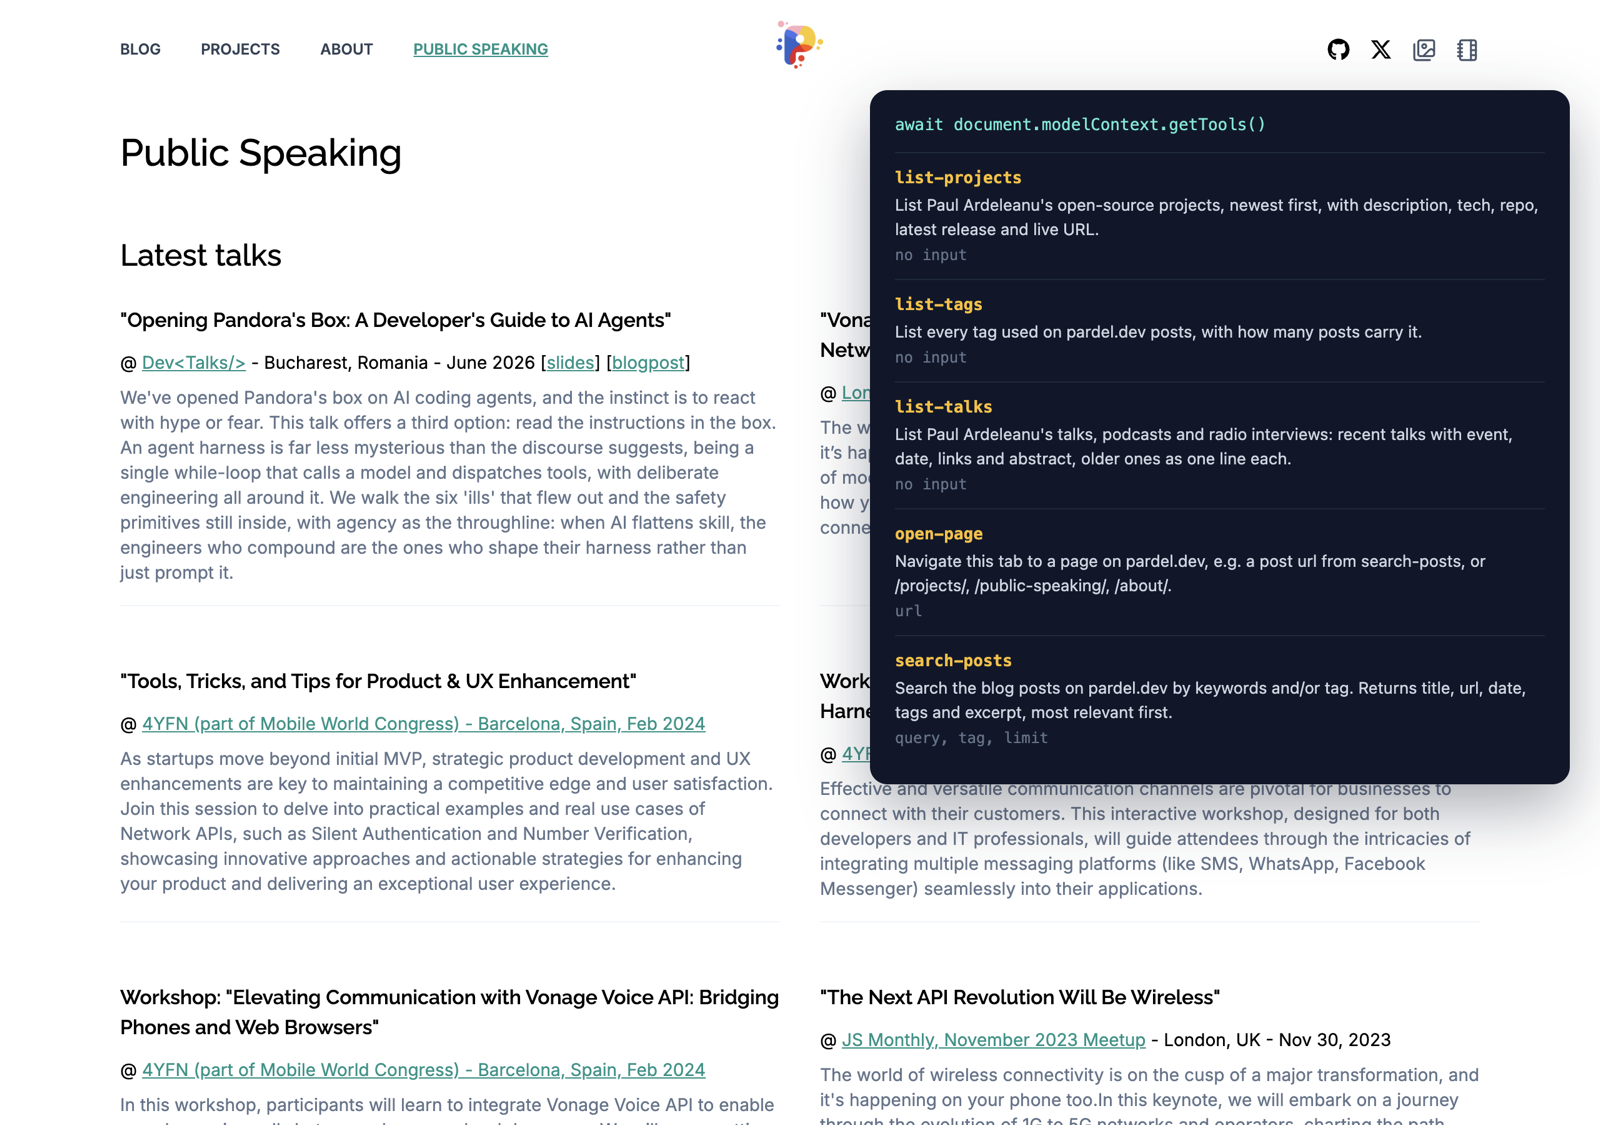
list-talks is the one I like most. My talks aren’t in a data file; they’re hand-written HTML on the Public Speaking page. So that page, and only that page, registers the tool, and the tool reads the talks straight out of the DOM a human reader is looking at:
var talks = document.querySelector('.public-speaking');
if (talks) {
  register({ name: 'list-talks', ... });
}
This is what the proposal recommends anyway: register the tools that make sense for the page you’re on, rather than every tool everywhere, so the agent isn’t wading through a long list that doesn’t apply.
Go to the Public Speaking page and the list grows by one:
Try it
- Use Chrome 149 or later and turn on
chrome://flags/#enable-webmcp-testing. - Install the Model Context Tool Inspector extension, the one Chrome’s WebMCP docs point to.
- Open pardel.dev and look at the tools it lists, then go to Public Speaking and watch
list-talksappear.
The Lesson
None of this was hard. One JSON file generated from data the site already had, one script of about 170 lines, one <script> tag in the footer. The blog looks and works exactly as it did.
What I didn’t expect is how much of the work was writing descriptions. The code is the easy part; saying clearly what each tool does, for a reader who only has the description to go on, is the same job as writing a good docs page. Which is more or less what the talk is about.